
How to Use Spin Doctor Tile Leveling System: 5 Steps, Sizes, Removal
Pick the base by joint: 1/16″ → 1.5mm, 1/8″ → 3.0mm. A 60×60cm floor takes 11.1 sets per m², so one 50-set bag covers about 4.5m². The cap is reused 50+ times; the base stays under the tile.
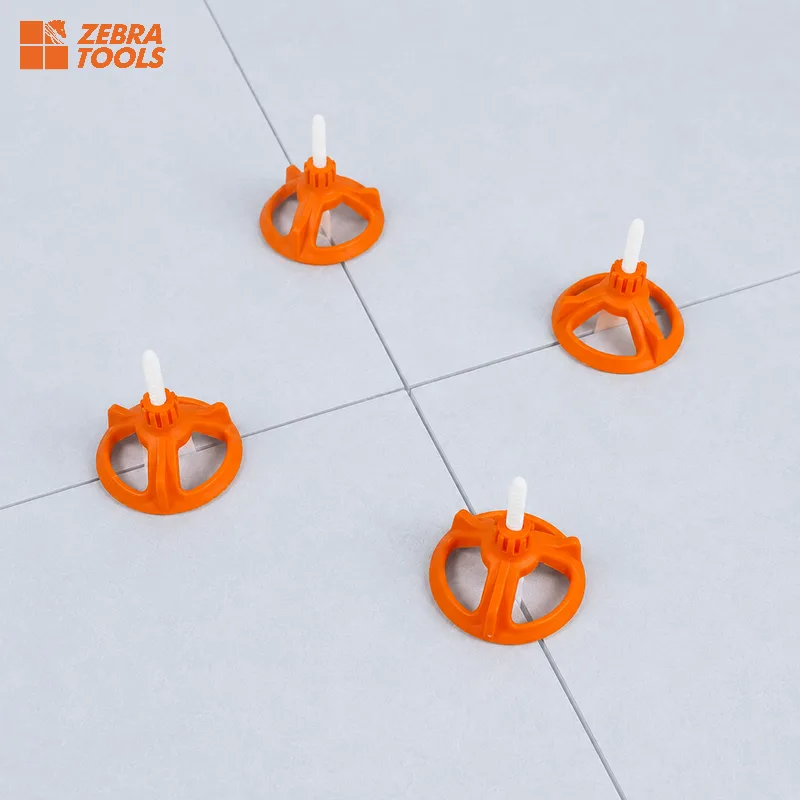
How to use Spin Doctor tile leveling system without stripping caps or locking in lippage: this guide is for tilers setting floor and wall tile and for distributors who stock twist-cap systems. ZEBRA TOOLS manufactures twist-cap leveling systems (BM-D01 and BM-D02) in Zhejiang, China, so the sizes, counts and removal rules below come from our own model records and the installation standard tiles are judged by.
The name needs one clarification first. Spin Doctor is a brand sold by Russo Trading Company (RTC). ZEBRA does not own that brand and does not present its models as RTC parts; both are twist-cap systems that work the same way, and where a figure applies to one product only, the text says which. Bottom line: the cap only pulls adjacent tile faces level — choose the base by joint width, stop turning when the faces are flush, and leave the cap on until the mortar reaches its grouting time.
How Does a Spin Doctor Tile Leveling System Work? 3 Parts
A twist-cap system replaces the clip and wedge with a threaded post and a cap. The base sits under the edges of neighboring tiles, its spacer sets the joint, and its threaded post rises through the joint. Turning the cap down the thread presses the high tile face toward the low one until both are flush.
| Part | Job | Used | ZEBRA BM-D01 / BM-D02 |
|---|---|---|---|
| Base with threaded post | Holds the joint width under the tile; carries the thread | Once — stays under the tile | 42×30×72mm / 47.7×31.6×25mm; 1.0, 1.5, 2.0, 3.0mm |
| Cap | Turns down the thread and presses the faces flush | 50+ times (factory-confirmed) | Ø57×36mm / Ø49×25.5mm |
| Protective pad | Sits between cap and tile face | Optional | BM-D01 component |
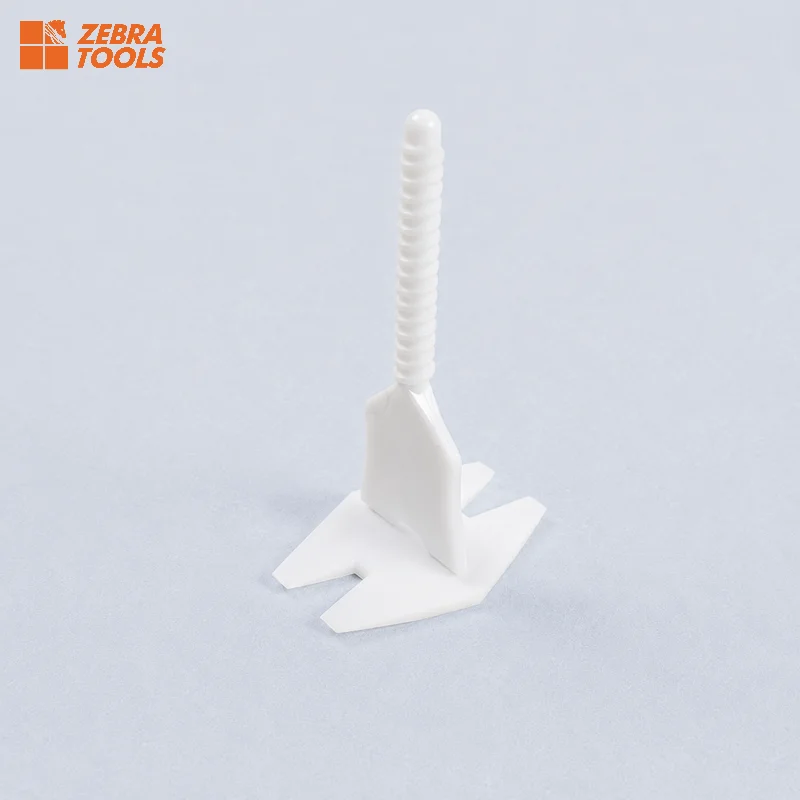
ZEBRA's spin tile leveling system comes in two cap sizes. BM-D01 (57mm cap) covers tile 3–25mm thick; BM-D02 (49mm cap) covers 3–18mm and leaves more room on narrow wall tile. For comparison, RTC lists its Spin Doctor for tile up to 3/4″ (20mm) with size variation of 1/32″ or less (Detroit Diamond Tools listing, retrieved November 13, 2026).
Which Base Size: 1/32, 1/16, 1/8 or 3/16 Inch?
US sizes are named by joint width, ZEBRA bases by millimetres. Convert the joint to millimetres, then take the closest base:
| Joint | In mm | ZEBRA spin base | Verdict |
|---|---|---|---|
| 1/32″ | 0.79 | 1.0mm (closest) | No 0.8mm spin base; use 1.0mm or a 0.8mm clip |
| 1/16″ | 1.59 | 1.5mm | Standard wall and rectified floor joint |
| — | 2.0 | 2.0mm | Metric 2mm joint |
| 1/8″ | 3.18 | 3.0mm | 0.18mm under; fine for tile ≤15″ |
| 3/16″ | 4.76 | None | Use a 4.5mm or 5.0mm clip-and-wedge |
The 3.0mm base has one hard limit. ANSI A108.02 requires an average joint of at least 1/8″ (3.18mm) for rectified tile with any side over 15″ and 3/16″ (4.76mm) for calibrated tile over 15″ (ANSI A108.02 §4.3.8.1 as quoted by the Ceramic Tile Education Foundation, Scott Carothers, updated January 23, 2024, retrieved November 13, 2026). No ZEBRA spin base reaches either value, so on an ANSI-specified 60×60cm or larger floor, use tile leveling clips with a 4.5mm (BM-B05) or 5.0mm (BM-B11) base instead.
How to Use Spin Doctor Tile Leveling System in 5 Steps
- Place the bases. Slide a base under the edges of neighboring tiles at every planned position, post pointing up through the joint. Plan 4 positions per tile until width plus length passes 160cm, then max(4, ceil((W + H) / 40cm)) — 5 for 60×120cm, 6 for 120×120cm. Keep the plate fully under the tile edges, not on top of mortar ridges.
- Set the tile. Press the tile into the mortar so the base is trapped under both edges. Check coverage on the first tiles: ANSI A108.5 asks for 80% contact in dry interior areas and 95% in wet and exterior areas, and the cap cannot make up for a hollow bed.
- Thread the cap on. Turn it clockwise by hand until it touches both tile faces. If your kit has a protective pad, put it under the cap first.
- Turn until flush, then stop. Check the joint with a straightedge across both tiles and stop turning the moment the faces meet. More turns press the tile down into the mortar and can starve the bed or crack thin tile. The target is ANSI's allowance of 1/32″ (0.8mm) plus the tile's own warpage at joints from 1/16″ to under 1/4″.
- Remove after cure. Leave the caps on until the mortar reaches the grouting time on its data sheet — there is no universal 24-hour rule, because cure changes with temperature and humidity. Twist each cap off counter-clockwise, then remove the exposed post in the direction the system specifies and clean the joint before grouting.
The same sequence for clip-and-wedge systems, with the extra wedge and plier steps, is in how to use tile leveling systems. What counts as acceptable after the caps come off is set out in tile lippage tolerance.
How Many Spin Sets per m²? 4.2 to 22.2
Sets per m² = positions per tile × 10,000 ÷ (W cm × H cm), with the positions from step 1. ZEBRA packs 50 sets per bag.
| Tile | Positions/tile | Sets/m² | m² per 50-set bag | Set cost/m² (FOB) |
|---|---|---|---|---|
| 30×60cm (12×24″) | 4 | 22.2 | 2.3 | $0.64–0.71 |
| 60×60cm | 4 | 11.1 | 4.5 | $0.32–0.36 |
| 80×80cm | 4 | 6.3 | 8.0 | $0.18–0.20 |
| 60×120cm | 5 | 6.9 | 7.2 | $0.20–0.22 |
| 120×120cm | 6 | 4.2 | 12.0 | $0.12–0.13 |
⚖️ Guide prices are FOB Ningbo at MOQ and subject to raw material cost fluctuations — contact us for current pricing. (price book updated 2026-11-19)
The cost column is the first job, cap included, at $1.45–1.60 per 50-set bag. Because each cap returns for 50+ jobs, a repeat crew buys mainly bases after the first order. Counts exclude cuts, perimeter and waste.
Spin Doctor or Clip and Wedge? 3 Cases for the Twist Cap
- Walls: the cap is hand-turned, so there is no plier squeeze against a fresh wall tile.
- Mixed thicknesses on one job: one BM-D01 set covers 3–25mm, where a clip range spans several models.
- Joints of 3.0mm or less: every ZEBRA spin base sits in 1.0–3.0mm. Above that, or on ANSI-specified tile over 15″, switch to clips.
Cost and speed side by side are in clip vs wedge vs spin doctor. For stocking, ZEBRA sells twist-cap sets at a 500-bag MOQ (25,000 sets, about 2,250m² of 60×60cm tile) next to the other tile leveling systems; mixed-SKU orders are on the tile leveling system wholesale page. ZEBRA is a tile leveling system manufacturer exporting to 50+ countries.
Spin Doctor Tile Leveling FAQ
How do you use a Spin Doctor tile leveling system?
Five steps: slide a threaded base under the tile edges at each planned position (4 per tile up to 60×60cm), set the tile into the mortar, thread the cap onto the post by hand, turn it clockwise until the adjacent tile faces are flush, then twist the cap off and remove the post once the mortar reaches the grouting time on its data sheet. The base stays under the tile; the cap is reused.
What size Spin Doctor base do I need for a 1/16 or 1/8 inch joint?
A 1/16″ joint is 1.59mm, so use the 1.5mm base; a 1/8″ joint is 3.18mm, so use the 3.0mm base. ZEBRA BM-D01 and BM-D02 both come in 1.0, 1.5, 2.0 and 3.0mm. There is no 3/16″ (4.76mm) ZEBRA base; for that joint use a clip-and-wedge system with a 4.5mm or 5.0mm clip.
How many Spin Doctor sets do I need per square meter?
11.1 sets per m² for 60×60cm tile and 22.2 per m² for 30×60cm (12×24″), at 4 positions per tile. Large tile needs fewer: 6.9 per m² for 60×120cm and 4.2 per m² for 120×120cm. One 50-set bag covers about 4.5m² of 60×60cm tile.
Are Spin Doctor caps reusable?
Yes. ZEBRA's factory confirms 50+ uses per cap; the threaded base is single-use and stays under the tile. Clean mortar off the cap after each job and retire any cap with a damaged thread, because a stripped thread no longer holds pressure.
Try the Twist Cap on Your Own Tile First
Tell us the tile thickness and joint width you sell into. We will send BM-D01 or BM-D02 samples in the matching base size so your installers can test them before you stock.
Request Spin System Samples →