
Complete Guide to Tile Leveling Components
Disposable clips set the interface, reusable wedges apply restraint and compatible pliers control insertion. Spacers, caps, shims and handling tools have separate roles.
A wholesale buyer comparing tile leveling components from a China manufacturer should separate the parts that work as one system from accessories sold in the same category. Clips, wedges and pliers must be compatible. Spacers control joint geometry. Reusable or spin-cap products use a different mechanism, while suction cups and mallets support handling or seating.
Bottom line: approve the system as a set, with tile thickness, joint width and removal method written beside every SKU.
7 Tile Leveling Components and Their Roles
| Component | Role | Key purchasing field |
|---|---|---|
| 1. Clip | Disposable base and stem placed below adjacent edges | Joint width and tile thickness |
| 2. Wedge | Reusable insert that applies restraint through the clip | Clip opening compatibility |
| 3. Pliers | Controls wedge insertion for the selected system | Floor/wall setup and adjustment |
| 4. Spacer | Controls joint geometry at crosses, edges or three-way intersections | Shape and nominal width |
| 5. Reusable screw-cap | Alternative tightening mechanism with reusable body | 5–20mm published tile range |
| 6. Spin-cap | Hand-tightened cap paired with a model-specific post or spacer | 3–25mm or 3–18mm variant |
| 7. Horseshoe shim | Reusable packer for alignment and support tasks | 1.5, 3.0, 5.0 or 6.5mm size |
Clips, Wedges and Spacers Control Different Conditions
| Part | Controls | Does not control | Reuse boundary |
|---|---|---|---|
| Clip | Model-specific interface; approved stem may set joint width | Substrate flatness, tile warpage, mortar contact | Disposable after break-off |
| Wedge | Applies restraint through a compatible clip | Layout geometry or joint width by itself | Reusable; inspect before use, no fixed cycle claim |
| Spacer | Joint geometry and nominal width at named positions | Active restraint between adjacent tile faces | Follow the selected model and installation method |
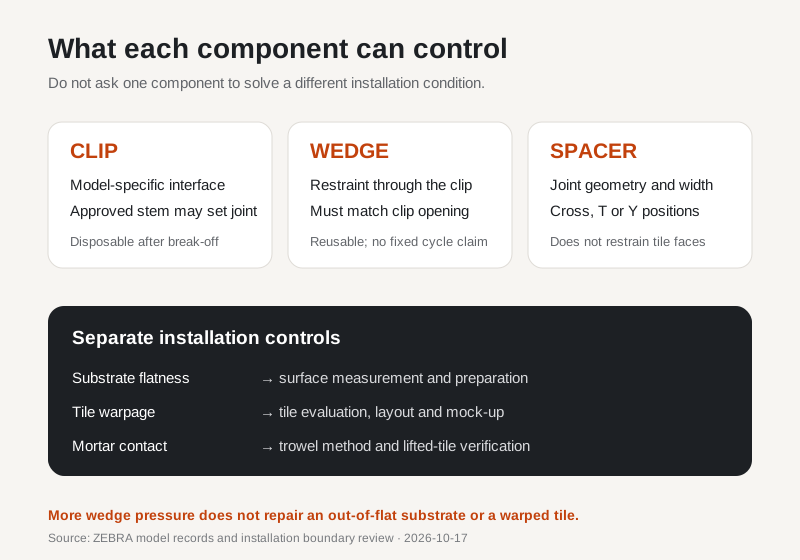
If a project still shows an edge-height difference after clips are installed, check the substrate plane, actual tile curvature and mortar contact before increasing wedge pressure. The separate guide explains why rectified tile still develops lippage.
Clips: Joint Width and Tile Range Come First
ZEBRA tile leveling clips use 100% virgin PP and are packed 100 pieces per bag. Across the model family, joint-width variants run from 0.5mm to 4.5mm. BM-B01 through BM-B05 are published for 3–14mm tile; BM-B06 is the thick-tile model for 14–24mm. Other models have their own ranges, so the model code belongs on the quote and PO.
The joint number does not answer how many clips a tile needs. Placement follows the system instructions and installation specification, with the tile format, edge condition and layout taken into account.
Wedges and Pliers Must Match the Clip
ZEBRA tile leveling wedges cover BM-A01–BM-A11. Material is PP or PE and the inner pack is 50 or 100 pieces according to the selected model. Request the clip and wedge as an approved pair rather than assuming one opening and taper fits every system. Pliers should be adjusted to the tile and system instructions; excessive force can damage components or disturb the installation.
Spacers, Reusable Systems and Spin Caps Are Different Choices
Cross tile spacers and T or Y spacers define joint geometry; they do not apply downward restraint like a wedge or cap. A reusable screw-cap system may suit buyers who want a reusable mechanism and have access for removal. A spin-cap system changes the tightening action and available tile range. Compare the full method, not the piece count alone.
Handling Accessories Are Outside the Leveling Mechanism
Suction cups help handle or position suitable surfaces; rubber mallets may support seating when the tile and installation method permit. Neither accessory sets the grout joint or corrects substrate flatness. Put their specifications and instructions on separate PO lines so a catalog bundle does not blur their functions.
Wholesale Approval Checklist
- Model code, material, joint width and tile-thickness range.
- Pieces per bag, bags per carton, barcode and artwork revision.
- Approved clip/wedge/plier combination or cap/post combination.
- Sample installation on the buyer's representative tile.
- Written defect classes and the pre-shipment inspection method.
Frequently Asked Questions
What does each tile leveling component control?
A clip defines the model-specific interface and works with a compatible wedge; the wedge applies restraint through that clip; a spacer defines joint geometry where the layout requires it. None corrects substrate flatness, tile warpage or inadequate mortar contact.
Do tile leveling clips replace tile spacers?
Only when the selected clip's stem width is approved as the required joint width. If the design or system instructions call for separate spacers, use them; do not assume every clip controls the finished joint.
Can tile leveling components fix an uneven floor?
No. They control the relative position of adjacent edges while mortar cures. Substrate flatness, tile warpage, mortar selection and coverage must be handled by the installation process.
Which component is reusable?
Wedges and pliers are reused in a clip-and-wedge system, while the clip is broken and discarded. Screw-cap levelers and spin-cap components have model-specific reusable and disposable parts, so confirm the selected product instructions.
Specify the Complete System
Send tile thickness, joint range and target pack format for a compatible component proposal.
Compare Tile Leveling Systems →